Table of Contents
How to Fix a Dripping Faucet
A dripping faucet is a common household problem that can be quite bothersome. Not only does it waste water, but it can also lead to higher water bills and potential damage to your fixtures and plumbing system. It’s important to address a dripping faucet promptly to avoid these issues and save water.
In this article, we will discuss the different types of faucets and their repair methods. Whether you have a compression faucet, washerless faucet, ball-type faucet, or ceramic-disk faucet, we’ve got you covered. We will provide step-by-step guides on how to fix each type of faucet.
Additionally, we will provide general steps that apply to any dripping faucet issue. These steps will guide you through the process of:
- Shutting off the water supply
- Disassembling the handle/cartridge/stem
- Replacing faulty components
- Reassembling the faucet
Having the right tools and materials is essential for a successful faucet repair job. We will also discuss the essential tools and materials you’ll need, such as wrenches, screwdrivers, replacement O-rings, and more. These items can be found at local hardware stores or purchased online.
To ensure your faucet repair is successful, we’ll provide some additional tips:
- Thoroughly inspect O-rings for damage or wear to prevent future leaks.
- Lubricate moving parts with plumber’s grease for smooth operation.
- Avoid over-tightening fittings during reassembly to prevent further issues.
While many dripping faucet problems can be fixed DIY-style, there are instances when it’s best to call a plumber. We’ll discuss signs that indicate a more serious underlying issue that requires expert attention.
Fixing a dripping faucet is not only beneficial for your wallet but also for the environment. By addressing this issue promptly, you can save water and avoid costly repairs down the line.
To get started with your faucet repair or for reliable and efficient faucet repair solutions in Chicago, we encourage you to contact Lifetime Plumbing, your trusted team of professional plumbers in Chicago. We specialize in fixing dripping faucets and all your plumbing needs. Call us today for expert service!
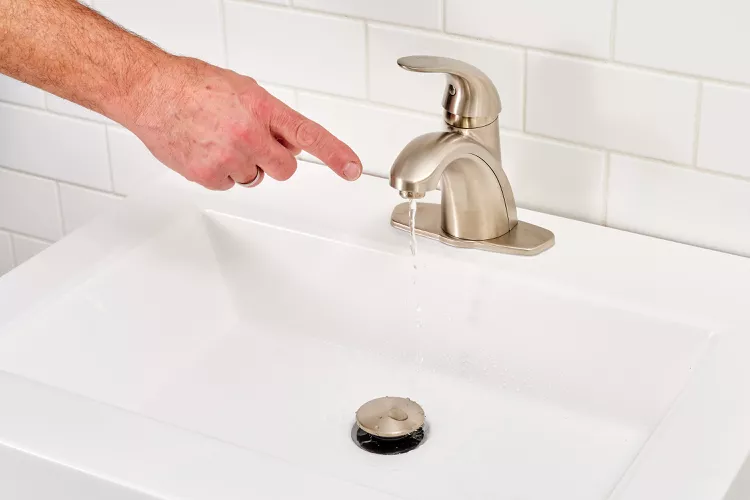
Understanding the Different Types of Faucets
When it comes to fixing a dripping faucet, the first step is to understand the different types of faucets and their unique repair methods. Let’s dive into the specifics of each type and how to address their issues.
1. Compression Faucet
A compression faucet is one of the most common types found in older homes. This traditional faucet operates with a stem that moves up and down to regulate water flow. Here’s how you can tackle a dripping compression faucet:
- Explanation of Operation: In a compression faucet, when you turn the handle, the stem lowers, allowing water to flow. A rubber washer at the bottom of the stem creates a seal when the water is off.
- Repair Steps:
- Replacing the Seat Washer: Start by turning off the water supply. Disassemble the faucet handle and remove the stem. Locate the seat washer at the bottom of the stem and replace it with a new one.
- Removing the Stem Nut: Use an adjustable wrench to carefully loosen and remove the stem nut, which will allow you to access the seat washer.
By following these steps, you can effectively address leakage issues with a compression faucet.
Remember to keep an eye out for any signs of corrosion or damage within the faucet components while performing these repairs.
2. Washerless Faucet
A washerless faucet is another common type of faucet found in many households. Unlike a compression faucet, which relies on a rubber washer to create a watertight seal, a washerless faucet utilizes alternative mechanisms to control the flow of water. Some examples of washerless faucets include ball-type faucets and ceramic-disk faucets.
How a Washerless Faucet Works
A washerless faucet typically contains an O-ring and a cartridge that work together to control the water flow. The O-ring, made of rubber or silicone, is positioned around the valve stem to create a seal when the faucet is closed. The cartridge, on the other hand, regulates the mixing of hot and cold water.
Repairing a Washerless Faucet
If you have a dripping washerless faucet, it is likely that either the O-ring or the cartridge needs to be replaced. Here’s a step-by-step guide on how to fix a dripping washerless faucet:
- Turn off the water supply: Before starting any repair work, it’s essential to shut off the water supply to avoid any accidents.
- Disassemble the faucet handle: Remove any decorative cap or cover on top of the handle and unscrew it using an appropriate screwdriver or Allen wrench.
- Inspect and replace the O-ring: Locate the O-ring, which is usually situated at the bottom of the valve stem. Carefully remove it and inspect it for any signs of wear or damage. If necessary, replace it with a new O-ring of the same size and material.
- Inspect and replace the cartridge: Depending on your specific faucet model, you may need to remove the cartridge for inspection and replacement. Refer to the manufacturer’s instructions or consult an expert if you are unsure about this step.
- Reassemble and test: Once you have replaced the damaged components, reassemble the faucet handle in the reverse order of disassembly. Make sure all the parts fit snugly and securely. Finally, turn on the water supply and test the faucet for any leaks.
Note: It’s important to mention that each washerless faucet may have slight variations in terms of design and repair methods. Always refer to the manufacturer’s instructions or seek professional assistance if you encounter any difficulties.
Additional Tips for Washerless Faucet Repair
Here are some additional tips to help you with repairing a washerless faucet:
- Clean the cartridge: Over time, debris or mineral buildup can accumulate inside the cartridge, affecting its performance. Regularly cleaning the cartridge with vinegar or a mild detergent can help maintain its efficiency.
- Inspect other components: While repairing a washerless faucet, it’s a good idea to inspect other components, such as the valve seat and aerator, for any signs of damage or blockage. Cleaning or replacing these parts if necessary can further improve the faucet’s performance.
By understanding how a washerless faucet works and following the appropriate repair techniques, you can effectively fix a dripping washerless faucet and restore its functionality. However, if you are unsure about any aspect of the repair process or if the problem persists despite your efforts, it is recommended to consult a professional plumber for assistance.
3. Ball-Type Faucet
When it comes to faucet types, the ball-type faucet stands out with its unique mechanism and specific repair techniques. Here’s a detailed look at how this type of faucet works and how to go about repairing it.
Understanding the Ball-Type Faucet
The ball-type faucet, also known as a ball faucet, operates using a rounded ball-shaped cap that controls the flow and temperature of the water. This spherical cap contains several small openings, each dedicated to hot and cold water, as well as a mixture of both. When the handle is turned, the ball rotates, aligning these openings with the faucet’s water inlets to regulate the water flow.
Repairing a Ball-Type Faucet
Repairing a dripping ball-type faucet involves replacing the neoprene seals and checking the ball for any signs of damage. Neoprene seals play a crucial role in preventing leaks by creating a watertight seal when the faucet is closed. Over time, these seals can wear out or become damaged, leading to dripping or leaking issues. Here’s a step-by-step guide to address this problem:
- Shutting off the Water: Before starting any repair work, it’s essential to turn off the water supply to the faucet. This prevents any accidental leaks or sprays while disassembling the components.
- Disassembling the Faucet: Carefully remove the handle and other components to access the internal parts of the faucet. Depending on your specific model, you may need to unscrew a dome-shaped cap or collar to reach the neoprene seals and ball.
- Inspecting and Replacing Neoprene Seals: Once you have access to the internal components, inspect the neoprene seals for any signs of wear, tearing, or damage. If needed, carefully remove the old seals and replace them with new ones that match your faucet model.
- Checking the Ball: While you have the faucet disassembled, take some time to examine the condition of the ball. Look for any cracks, chips, or rough spots that could compromise its function. If you notice significant damage, it’s advisable to replace the ball as well.
Address dripping issues by following the steps
By following these steps and paying attention to details during the repair process, you can effectively address dripping issues associated with a ball-type faucet.
Remember that each type of faucet has its own unique characteristics and repair requirements. Understanding these specifics is crucial for successfully resolving dripping or leaking problems without causing further damage.
With a clear understanding of how each type of faucet operates and how to approach their repairs, you’ll be better equipped to tackle common plumbing issues effectively and keep your faucets in optimal working condition.
4. Ceramic-Disk Faucet
When dealing with a dripping faucet, it’s crucial to know the various faucet types and how they work. In this section, we’ll focus on the ceramic-disk faucet (also called a disc faucet) and give you a clear guide on how to check and replace the ceramic-disk cartridge.
What is a Ceramic-Disk Faucet?
Ceramic-disk faucets are gaining popularity because of their durability and smooth operation. Unlike compression faucets with rubber washers or washerless faucets with O-rings, these faucets use two ceramic disks to control water flow. These disks move against each other to open or close the water passages, eliminating the need for washers or O-rings.
Steps to Repair a Leaking Ceramic-Disk Faucet
Here’s what you need to do if you have a leaky ceramic-disk faucet:
- Turn off the water supply: To avoid any mishaps, always shut off the water supply before doing any repairs. Look for the shut-off valves beneath your sink and turn them clockwise to close.
- Take off the handle: Use a screwdriver to remove any screws holding the handle in place. If there’s a decorative cap hiding the screw, gently pry it out with a flathead screwdriver.
- Find and remove the cartridge: The cartridge is usually located beneath the handle. Use an adjustable wrench or pliers to loosen and take out the cartridge by turning it counterclockwise.
- Inspect the ceramic-disk cartridge: Once you’ve removed the cartridge, carefully examine it for cracks, chips, or mineral buildup. If you spot any damage or signs of wear, it’s time to get a replacement.
- Replace the ceramic-disk cartridge: Purchase a new ceramic-disk cartridge that matches your old one. Apply plumber’s grease for smooth operation and insert the new cartridge into its original position. Tighten it by turning clockwise using an adjustable wrench or pliers.
- Put the faucet back together: Place the handle back onto the faucet and secure it with the screws. If there was a decorative cap, snap it back on.
- Turn on the water supply: After reassembling everything, turn on the water supply by opening the shut-off valves counterclockwise. Test the faucet to make sure there are no more leaks.
Repairing a ceramic-disk faucet may require a bit more effort compared to other types, but it’s worth it for their long-lasting performance and reliability.
💡 Pro tip: Remember, each faucet type has its own unique mechanism and repair process. So before you start fixing anything, familiarize yourself with your specific faucet type. And if you’re unsure or uncomfortable doing DIY repairs, don’t hesitate to call a professional plumber for help.
Now that you know how to fix a ceramic-disk faucet, let’s move on to the next section where we’ll talk about the essential tools and materials you’ll need for any faucet repair job.
General Steps to Repair Any Dripping Faucet
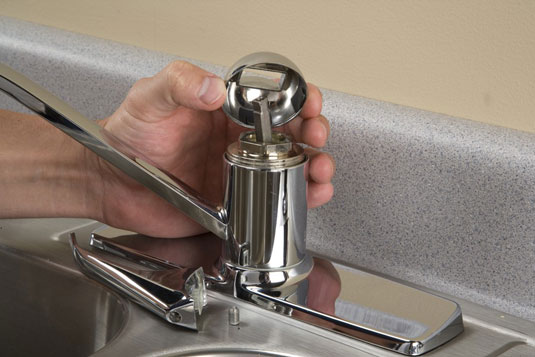
When it comes to fixing a dripping faucet, there are some general steps that you can follow, regardless of the type of faucet you have. These steps will help you identify and resolve the issue causing the leak. Here’s a breakdown of the general steps:
- Shut off the water supply: Before you begin any repair work, it is crucial to turn off the water supply to your faucet. Look for the shut-off valves under the sink or near the water meter and close them to prevent any water from flowing while you work.
- Disassemble the handle/cartridge/stem: The next step is to remove the handle or lever of your faucet. This can usually be done by unscrewing a screw or popping off a decorative cap and then loosening a retaining nut. Once you have removed the handle, you can access the cartridge or stem.
- Inspect and replace faulty components: Take a close look at the cartridge or stem for any signs of damage, such as worn-out seals or o-rings. If you notice any issues, it’s time to replace these components with new ones. Make sure to choose replacements that are compatible with your specific faucet model.
- Reassemble the faucet: After replacing any faulty components, carefully reassemble the faucet in reverse order. Ensure that all parts are properly aligned and tightened but avoid over-tightening, as this can cause damage.
- Test for leaks: Once you have reassembled the faucet, turn on the water supply and test for any leaks. Allow the water to run for a few minutes and check if there are any signs of dripping or leakage from the repaired faucet.
Fix dripping issues by following the steps
By following these general steps, you should be able to fix most dripping faucets. However, it’s important to note that different types of faucets may have additional steps or unique repair methods. For a more detailed guide, consult the manufacturer’s instructions or seek professional help if needed.
Remember, taking the time to fix a dripping faucet not only saves water but also prevents further damage and potential costly repairs down the line. So don’t delay in addressing this common household issue.
Essential Tools and Materials for Repair Any Dripping Faucet
When it comes to fixing a dripping faucet, having the right tools and materials is crucial for a successful repair job. Here’s a list of essential items you’ll need:
- Wrenches: Adjustable wrenches and pipe wrenches are essential for loosening and tightening different plumbing connections.
- Screwdrivers: Both flat-head and Phillips-head screwdrivers will come in handy for removing screws that hold the faucet components together.
- Replacement O-rings: O-rings create a watertight seal in faucets and are often the cause of leaks when they become worn or damaged.
- Plumber’s Tape: Also known as Teflon tape, this thin white tape is wrapped around threaded pipe connections to prevent leaks.
- Allen Wrench: Some faucets may have hexagonal set screws that require an Allen wrench for removal.
- Replacement Washers and Seals: For compression faucets, it’s important to have replacement seat washers, rubber seals, and springs.
These tools and materials can typically be found at local hardware stores or home improvement centers. Additionally, many items are available for purchase online, providing convenience and accessibility for those undertaking faucet repair projects.
By having these essential tools and materials on hand, you’ll be well-prepared to tackle any dripping faucet issue that comes your way.
Additional Tips for Successful Repair Any Dripping Faucet
When it comes to fixing a leaky faucet, there are a few additional tips that can help ensure a successful repair job. These tips will not only help you fix the immediate issue but also prevent future leaks and extend the lifespan of your faucet. Here are some important points to keep in mind:
- Thorough O-ring Inspection: One common cause of faucet leaks is a worn or damaged O-ring. When you take apart your faucet, check the O-rings carefully for any signs of wear or damage such as cracks, tears, or flattened areas. If you notice any problems, replace the O-rings with new ones. This will create a proper seal and prevent water from leaking out.
- Lubricate Moving Parts: To make sure your faucet operates smoothly and reduce friction, it’s important to lubricate the moving parts. Use plumber’s grease or silicone-based lubricant to coat any areas where metal components rub against each other. This will help prevent wear and tear, making your faucet last longer.
- Avoid Over-Tightening: While it’s necessary to ensure all fittings are secure when putting things back together, over-tightening can cause more issues. Tighten each fitting just enough to create a watertight seal without applying excessive pressure on the components. Over-tightening can lead to stripped threads or cracked fittings, which will require more extensive repairs.
- Clean with Vinegar: Over time, mineral deposits and sediment can accumulate inside your faucet, affecting its performance and causing leaks. To get rid of these deposits, soak the faucet parts in vinegar for a few hours or overnight. Vinegar helps dissolve mineral buildup and restores proper water flow. After soaking, rinse the parts thoroughly with water before reassembling.
Remember that each faucet type may have specific repair methods and considerations, so always refer to the manufacturer’s instructions or consult a professional if you are unsure about any steps.
When to Call a Professional
While many dripping faucet problems can be fixed with DIY repairs, there are instances when it’s best to leave the job to a professional plumber. Here are some signs that indicate a more serious underlying issue that requires expert attention:
- Low Water Pressure Throughout the House: If you notice significantly reduced water pressure in multiple faucets or fixtures, it could be a sign of a larger plumbing problem. This could be caused by issues such as clogged pipes, a faulty water main, or even a problem with the municipal water supply.
- Rusty Water from the Faucet: If you turn on your faucet and notice discolored or rusty water coming out, it’s a clear indication that there is corrosion or rust somewhere in your plumbing system. This could be due to aging pipes or other underlying issues. Rusty water can not only be unsightly but also pose health risks if consumed.
- Persistent Leaks Despite Repairs: If you’ve attempted DIY repairs on your dripping faucet but the problem persists or worsens, it may be time to call in a professional. Oftentimes, leaks can have multiple causes that require specialized knowledge and tools to address effectively.
- Lack of Experience or Confidence: Not everyone is comfortable working with plumbing systems, and that’s perfectly okay. If you lack experience in plumbing repairs or feel unsure about tackling the problem yourself, it’s best to consult a professional plumber. They have the training and expertise necessary to handle various faucet repair scenarios safely and efficiently.
Remember, attempting complex plumbing repairs without proper knowledge and tools can lead to further damage or even personal injury. It’s always better to err on the side of caution and seek professional help when needed.
“When it comes to plumbing installations and repairs, it’s essential to know your limits. If you’re unsure about the best course of action or lack the necessary expertise, it’s wise to call a professional plumber. They can provide reliable solutions and ensure the long-term functionality of your plumbing system.”
Conclusion
As we’ve discussed throughout this article, addressing a dripping faucet promptly is crucial to save water and prevent costly repairs. A small leak may seem insignificant, but it can waste gallons of water over time and contribute to higher utility bills. By fixing a dripping faucet, you not only conserve water but also protect the environment.
In the Chicago area, if you’re experiencing a dripping faucet or any other plumbing issue, it’s best to seek professional assistance. Lifetime Plumbing, a trusted local plumbing company provides reliable and efficient faucet repair solutions. Our team of experienced plumbers has the expertise to diagnose and fix all types of faucet problems, ensuring long-lasting results. We can also help with just a simple faucet installation.
Remember, attempting DIY repairs is commendable, but some situations may require the skills and knowledge of a professional plumber. Signs such as low water pressure throughout your house or rusty water coming from your faucet indicate a more serious underlying issue that needs expert attention. Don’t hesitate to reach out to Lifetime Plumbing for our expertise in plumbing services.
By addressing your dripping faucet promptly and seeking professional help when needed, you can maintain the functionality and efficiency of your plumbing system while saving money and conserving water.
Contact Lifetime Plumbing today for all your faucet repair needs in the Chicago area. Don’t let a dripping faucet go unresolved—take action and enjoy a leak-free home!
More Posts You May Find Interesting
Table of Contents

